
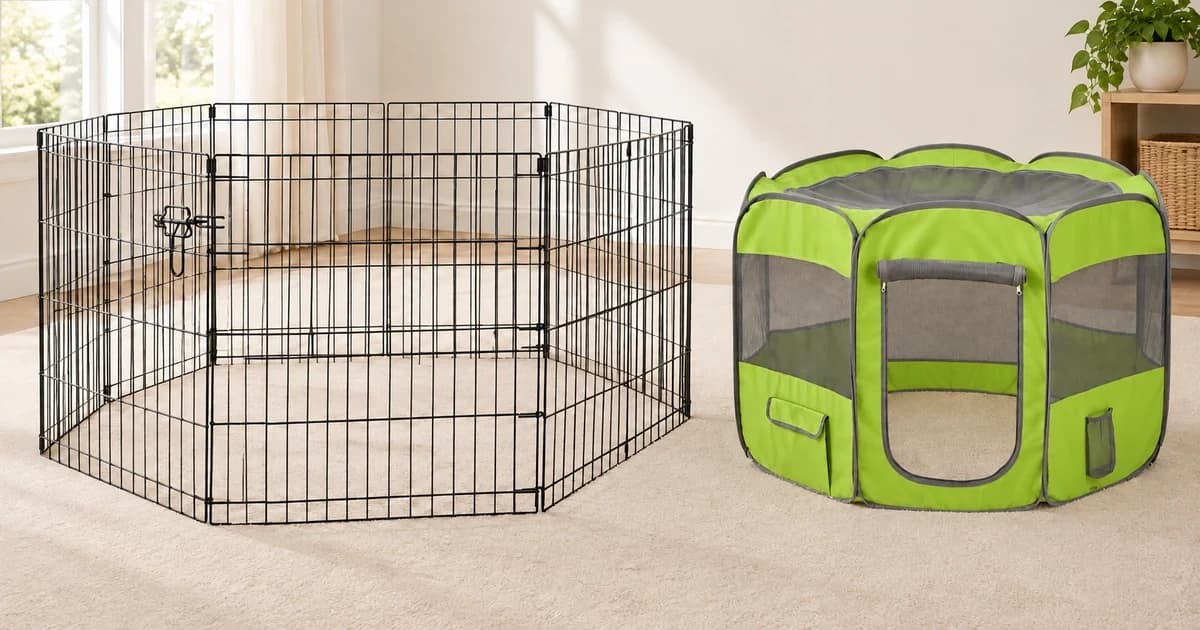
To set up a dog exercise pen indoors, confirm that your exact model permits the intended surface and configuration, assemble it with its specified connectors, and check the door before bringing your dog inside. Leave space for the opening door and your own access. Floor protection and a closed gate answer different questions; neither proves that a pen will contain every dog.
This guide compares manufacturer instructions for several connection systems. The examples explain what to look for in your own manual; they are not interchangeable assembly instructions or results from hands-on testing.
Confirm the model can be used on your indoor surface
Check the intended use, any animal-size or behavior restrictions, required parts and supported layouts. An outdoor stake and an indoor connector can look similar while serving different purposes.
A specific example matters here. The FXW Rollick 24-, 32- and 40-inch manual explains that fully inserted rods fill the arcs between adjacent panels. It advises against indoor use, or other settings where the rods cannot enter the ground, for dogs with thinner paws because those gaps may trap a paw. That is a model-specific restriction, not a rule that every wire pen needs ground stakes.
The FXW FAQ also discusses floor protectors for indoor Rollick use. A protector addresses contact with the floor; the FAQ does not explain how it resolves the manual's thin-paw gap warning. Do not treat a mat or protector as evidence that this restriction has disappeared.
Compare the construction and documentation of exercise pens, then choose an indoor-compatible arrangement. Avoid assuming that a taller version, heavier frame or marketing claim settles suitability.
Lay out the footprint and the route through the door
Clear the proposed area before assembling. Consider the shape allowed by the connectors, the usable space inside, and the space outside needed to open the gate and reach the pen. Measure the planned arrangement against the room; a panel's height or width alone does not describe the installed footprint.
- Position the door where you can operate its latch and pass through the opening.
- Allow for the door's actual travel and any bottom rail or projecting feet. Keep the household walking route clear.
- Check that every base or foot sits on the surface as the instructions require. For example, Richell specifies a stable, flat surface for its convertible playpen to lock correctly.
- Use the model's documented floor pads or accessories where applicable. Check their placement rather than assuming any rug or adhesive is equivalent.
Do this with the pen empty. If the proposed shape blocks access or prevents a joint from sitting correctly, change the location or use another permitted configuration. Do not force a fixed-angle connector into a curve to fit spare floor space.
Follow the connection system you actually have
Compare every supplied part with the inventory in the matching instructions. Similar-looking pens can use very different joints:
| Named example | Connection check | What does not transfer |
|---|---|---|
| MidWest exercise pen with door, instruction version 2210 | Eight connected panels close with four supplied snaps. The manual shows two at the upper and lower closely spaced wires and two distributed along the middle. | A different pen's number of anchors, latch details or clips. |
| FXW Homeplus 24- and 32-inch models | Align the offset connection rings, insert the joining rod and locate the specified silicone pads and muffler tubes. | Rollick's ground-insertion method or an improvised substitute for the supplied parts. |
| Richell convertible playpen, L4/L6/M4/M6/H4/H6 scope | Join panel stems to their holes, position the top and bottom caps at a permitted angle, then fully insert and turn the hole pins. | Arbitrary curved layouts or another brand's snap hardware. |
| Pet Gear Travel Lite TL4129/TL4136/TL4146 | Release the retaining straps, unfold the pen and push the sides into their fully opened positions as illustrated. | Wire-panel clips or a universal twist-fold method for fabric pens. |
These checks come from the MidWest door-pen instructions, Homeplus manual, Richell convertible-playpen manual and Pet Gear Travel Lite manual. Match the model before applying a row.
Richell's caps permit 90-, 120- or 180-degree angles. Its hole pins must be fully inserted and turned 90 degrees; a cap that appears to rest in place is not the completed connection. In a fabric pen, check the frame's opened position and the condition of the material instead of looking for a wire snap.
Use approved replacement parts and compatible extensions. Do not join different series, attach a pen to furniture, or replace connectors with ties solely because the arrangement seems to hold. Manufacturer permission for one crate-to-pen connection does not establish compatibility with every crate or enclosure.
Close an empty pen and check the whole door mechanism
Operate the door without your dog inside. Identify each required latch or retaining feature and verify it separately. A closing sound does not tell you whether every part is engaged.
For the MidWest models covered by instruction version 2210, the door must close over the safety loop, both latch handles must be down, and the additional safety clip is fastened. Those details differ from other MidWest door designs; use the diagram for your model.
Richell's convertible door lifts to release its upper and lower locks. Its manual notes that closing with too much or too little force can prevent automatic locking. Check the upper lock pin's specified closed position and the lower lock rather than relying on the word automatic.
Keep the door's route clear and check for catching, damaged components or an incomplete connection. A fabric door's zipper or rolled flap needs its own instructions; a metal-gate latch sequence is irrelevant.
Inspect before use and observe without testing containment
Look for missing parts, loose joints, bent hardware, sharp edges, torn mesh or damaged stitching. Pet Gear requires inspection before each use and says not to use its pen with missing or broken parts. FXW also calls for regular damage checks and replacement of damaged equipment.
Follow the warnings supplied with your model. The cited MidWest and FXW manuals direct owners to remove collars, tags and leads before pen use; Pet Gear specifies removing collars and leashes. Keep your dog in view as required, and avoid the area hazards identified in the instructions. Assembly checks do not turn a pen into a suitable restraint for aggressive, destructive or persistently escaping behavior.
Observe the first use while supervising. If panels move out of position, the door stops closing correctly, or your dog tries to get through, over or under the enclosure, discontinue that arrangement and reassess it. Do not deliberately push your dog against the pen or leave them alone to see whether it holds. This is an observation of use, not a strength or escape-resistance test.
Save a setup record for the next move
Keep a short note with the manual so you can repeat the checks after moving, folding or expanding the pen:
| Record | What to write down |
|---|---|
| Model and instructions | Exact model, manual version and applicable indoor-use restrictions. |
| Location and shape | Floor surface, permitted configuration, measured footprint and door access. |
| Connections | Parts counted, joints checked and any missing, damaged or uncertain component. |
| Door | Each required lock or clip and what you observed when closing it. |
| Change and follow-up |
This is a blank owner record, not a report of a Pawlivy product test. If you are still choosing between enclosure types, compare crates, pens and home equipment by the task you need them to perform. Our editorial policy explains how we use manufacturer sources and handle corrections.