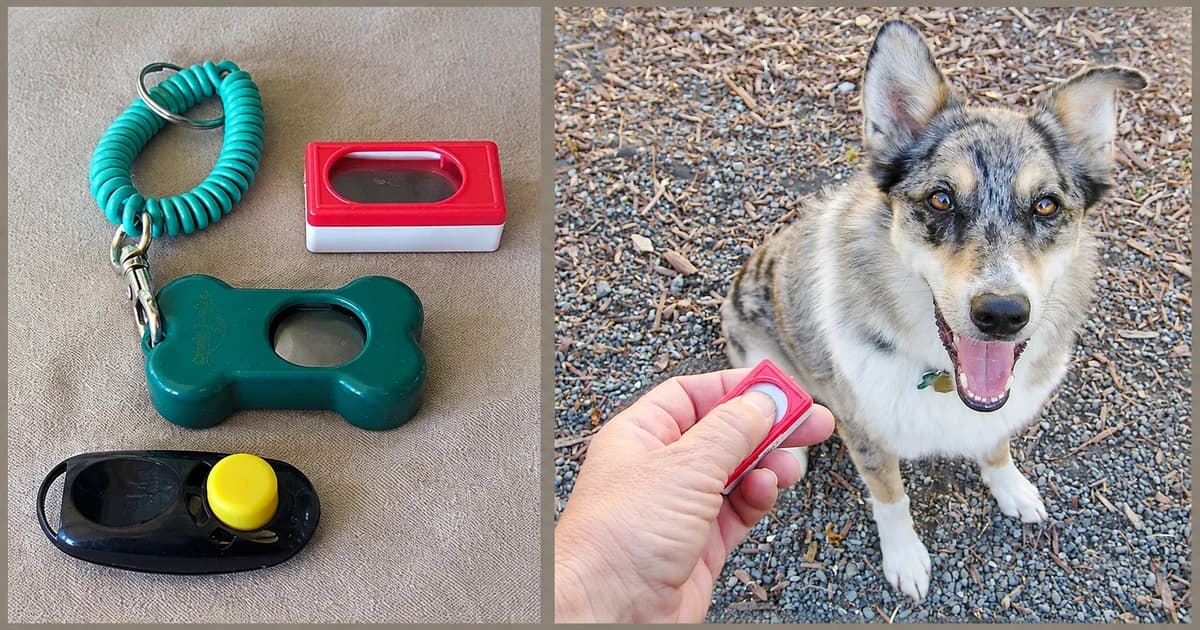
Learn how to use a dog clicker in two distinct steps: first build the connection between the click sound and an immediate food reward, and then press the clicker at the exact moment your dog performs a chosen action, following every click with a treat. A click marks a behavior that just happened; it is never a command or a recall cue.
Prepare the setting and reward
Practise in a quiet room and hold the clicker away from your dog's ears, as advised in Blue Cross's clicker training guide. Stop immediately if the sharp sound startles or worries your dog.
Keep small, high-value treats ready in reach. Battersea's dog training overview notes that a consistent spoken marker word can replace a clicker whenever a dog dislikes the mechanical sound.
Check the button feel of your clicker before bringing your dog into the session; our dog clickers category offers an equipment starting point. Decide beforehand who holds the clicker and who delivers the treats so timing stays consistent.
Step 1: Connect sound and reward
In the introductory pairing exercise described by Blue Cross and the American Kennel Club (AKC), wait while your dog is calm without cueing any specific action: press the clicker once, immediately deliver a treat, and repeat several times. Watch for your dog to look toward you or your treat hand expectantly right after the sound—relying on that observed reward expectation rather than a fixed number of repetitions. (While some training programmes mark natural behaviour from the outset, this separate pairing step makes it easy to confirm your dog understands the sound before you add movement tasks.)
Step 2: Mark the exact moment of behavior
Once the click predicts a treat, watch your dog closely and press the clicker at the precise instant the target behavior happens, then deliver the reward right away. Never click to get your dog's attention or repeat clicks like a command. Both Blue Cross and the AKC stress rewarding every single click, even when you press the button by mistake.
| Practice stage | Action sequence | What to observe before moving on |
|---|---|---|
| Stage A: Sound-to-reward pairing | No cue given → Click once → Deliver treat immediately. | Your dog perks up or looks toward you expecting a treat as soon as the click sounds. |
| Stage B: Behavior marking | Dog performs the target position (lured, captured, or cued) → Click during the exact action →Current attempt ends → Deliver treat. | Your dog repeats the marked action more readily; if you click too early or late, still deliver the treat and reset calmly. |
For the physical movement and verbal cue rules of a specific exercise, follow our sit lesson or hand-target lesson. Choose the exact body movement you intend to mark before starting a repetition.
After a mistimed click, give the treat anyway and reset the position. As Blue Cross explains, the click finishes that repetition so your dog can move to collect the reward.
Pause or progress
If your dog shows no reward expectation after the click, return to simple sound-and-treat pairing. If your dog turns away from food or looks uneasy, pause the session and reconsider the room, treat value, or whether a softer verbal marker suits them better.
Once a cued behavior is well established, the AKC notes that you can gradually phase out the clicker, while still delivering a reward whenever you do click.
Keep notes for the next caregiver simple: write down the behavior practised, the exact moment you aimed to mark, how your dog responded, and where the next session should resume, leaving any unverified detail marked as unknown.