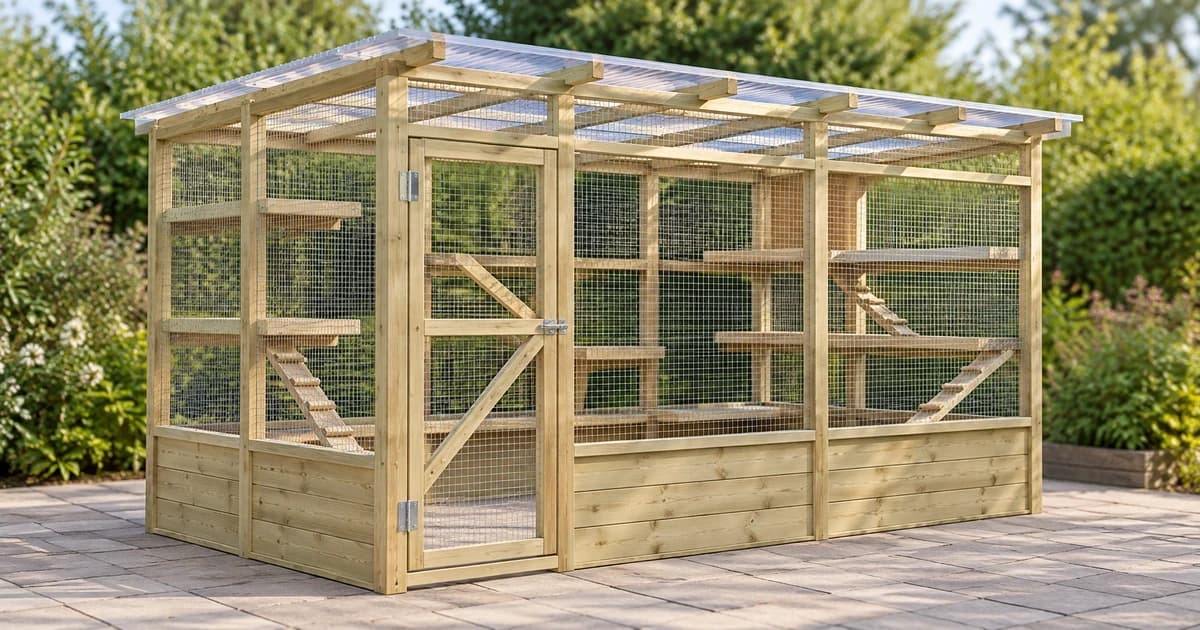
To build a catio, choose a complete plan that matches your measured outdoor space and the entry route from your home, then follow that plan's drawings, material list, and assembly steps together. Work out the wall panels, roof, human doorway, and any connecting cat tunnel before buying lumber or wire mesh—a finished enclosure photograph can never supply missing framing dimensions or wall-fixing specs.
The BC SPCA's four-page stand-alone catio plan provides a concrete walkthrough below. Important pre-purchase note for the BC SPCA example: this article summarizes the construction stages rather than reproducing the full engineering drawings, and page 3 of the BC SPCA PDF prints an ambiguous tunnel deck-board dimension (“5/6 x 6 inch”) that you must review in the tunnel and house connection section below and clarify before buying lumber. Different sites and pre-made catios and outdoor cat enclosures require their own exact manuals.
Start with the Site and the Entrance Route
Draw where the catio will stand and how your cat will enter it: through an existing window, an existing cat door, or a proposed new wall opening. Record the available footprint and height, the swing clearance for the human entrance door, and the span between the house and the enclosure with units clearly labeled. Include site photographs whenever you review layout adaptations with your plan provider or contractor.
Catio Spaces' public DIY plans overview begins with location, space, and access, distinguishing window-box, three-sided, and four-sided freestanding designs (including a stand-alone enclosure linked by a tunnel). Those site choices determine which complete plan you need; a public plan overview outlines what a plan package contains but does not replace the full construction drawings or verify local building rules.
| Your Pre-Build Record | What It Determines | Question to Resolve Before Buying Materials |
|---|---|---|
| Location and measured space | Which plan's footprint, roof pitch, and height fit your yard or patio. | Does that plan suit this exact ground surface, drainage, and property line? |
| Home-to-catio route | Direct wall/window entry versus a separately framed cat tunnel. | Which document or contractor specifies the structural attachment to the house? |
| Human doorway | Where you step inside to clean, maintain shelves, and reach your cat. | Does the proposed orientation leave full swing and latch clearance for the door? |
| Exact plan or kit version | The matching cut list, hardware schedule, diagrams, and build sequence. | Are all pages present, and have any unclear printed dimensions (such as tunnel board sizes) been clarified? |
Treat this site record as a project scope checklist for your plan provider or licensed builder—not as a substitute for foundation design, wall-anchoring specs, or local wind/snow load calculations.
Understand the BC SPCA Stand-Alone Build Sequence
Read all four pages of the BC SPCA stand-alone catio and tunnel plan before buying materials from its shopping list. The document notes that its dimensions are examples and warns that existing house walls and ground surfaces may not be straight, square, or level. Before ordering lumber from the BC SPCA list, check the tunnel dimension note below regarding the page 3 “5/6 x 6 inch” deck-board entry:
- Lay out the enclosure. Confirm the exact footprint and height on your site, keeping the component drawings and material shopping list side by side.
- Frame the wall panels and tunnel entrance opening. The sequence builds front, back, and side wall frames, including a dedicated framed opening where the optional cat tunnel meets the enclosure wall. Settle that opening height and position before stapling wire mesh.
- Attach the mesh and join the four walls. The plan fastens wire mesh to the individual wall frames before joining the four wall assemblies into a standing box. Keep the specified mesh gauge and fastener method tied to this timber design.
- Install the roof and human access door. The next stage covers the top frame and hangs the hinged, latched human doorway. Work directly from the PDF's door diagrams and hardware notes rather than estimating hinge or latch placement from an overview graphic.
- Build the connecting tunnel only if your route requires it. Pages 3 and 4 detail the elevated walkway, support brackets, mesh wrapping, and end connections—a separate construction stage that must be planned upfront rather than cut into finished mesh afterward.
Keep the original cut list and tool list paired with their matching pages, and do not swap in a heavier roof panel or different mesh roll without having a qualified builder verify that the framing and fasteners support the change.
Resolve the Tunnel and House Connection Before Buying Lumber
A freestanding enclosure linked by a tunnel needs a documented path all the way to the house wall or window. Measure the horizontal span, the entry height at both ends, and the wall framing where support brackets will land. While the BC SPCA PDF illustrates a bracketed walkway, a general drawing cannot identify your home's siding, sheathing, or masonry fixings.
Crucial dimension check on page 3 of the BC SPCA tunnel plan: the shopping list prints the tunnel deck-board size as “5/6 x 6 inch.” Have the plan source or the contractor specifying your lumber clarify that exact board thickness and width before you buy materials—do not silently substitute a more familiar nominal fraction on your own.
If your catio route requires cutting a new cat-door opening through an exterior wall or door, the BC SPCA plan advises hiring a qualified contractor to inspect the structure and perform the installation. Prepare the door cutout specs using our cat-door fitting guide, and handle microchip-door enrollment and access modes as a separate step once the door is installed.
Use a Purchased Kit's Exact Revision and Manual
Modular wire or timber kits follow their own revision-specific manuals rather than DIY framing plans. For example, Omlet's catio support center publishes separate assembly manuals for the WIR MK3 and the pre-June 2023 WIR MK2. Match your exact generation code before downloading assembly or extension instructions.
Omlet's support page also separates its modular cat tunnel system from bolting an enclosure flush against a house wall—stating that there is no universal ready-made house-attachment kit and advising owners to consult a local specialist for direct building connections.
Keep Your Catio Project Documents Together
Store these four records together from planning through final inspection so no dimension or mounting question is left to guesswork:
| Keep With the Project | Use It For |
|---|---|
| Complete named plan PDF or matching kit revision manual | Component drawings, cut lists, fasteners, tools, and step-by-step assembly order. |
| Your measured site and access sketch | Verifying footprint, ground slope, human door swing, and house-to-catio tunnel span. |
| Written specification clarifications | Recording resolved dimensions (such as the BC SPCA page 3 “5/6 x 6 inch” tunnel board note) and approved material substitutions. |
| Contractor's building-connection details | Wall framing, exterior siding penetrations, flashing, and site-specific anchors that a general plan cannot specify. |
Begin cutting or assembling only after your complete plan and site-specific connection details are in hand. See our editorial policy for how we cite primary building plans and preserve source boundaries.